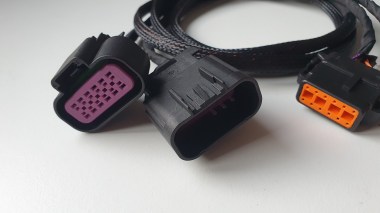
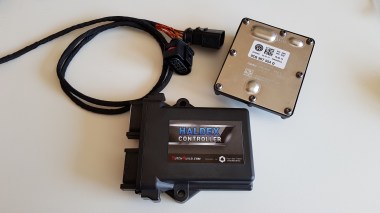
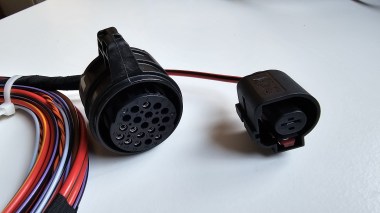
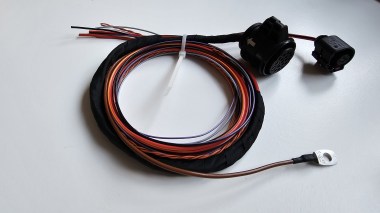
Wiring installation
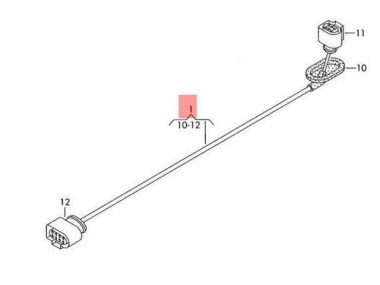
2 PIN Sensor | From | To | ||||||
LI/BR | T2/2 | T36/16 | Plug in | Signal | Blue/White | Sensor Signal plug it into cluster connector T36 pin 16 | ||
BR/BL | T2/1 | T36/33 | Solder | Sensor ground | Brown/White | Ground signal solder to wire from cluster connector T36 pin 33 | ||
3 PIIN Sensor | ||||||||
BR/BL | T3/1 | T32/20 | Solder | Sensor ground | Brown/White | Ground signal solder to wire from cluster connector T32 pin 20 | ||
BL | T3/2 | T32/3 | Plug in | Signal | Blue | Sensor Signal plug it into cluster connector T32 pin 3 | ||
LI/WI | T3/3 | T32/4 | Plug in | Signal | Sensor Signal plug it into cluster connector T32 pin 4 | |||
Haldex Connector | ||||||||
SW/LI | T8/1 | Solder | 12v | Red | Connect to switched 12volt you can find one behind fusebox driver side | |||
BR | T8/2 | Ground | Brown | Connect to ground | ||||
OR/BR | T8/5 | Solder | CAN Low | Orange/Brown | Connect to canbus wires near the gateway located above footwell the pedal right side | |||
OR/BL | T8/6 | Solder | CAN High | Orange/Black | Connect to canbus wires near the gateway located above footwell the pedal right side | |||
SW/RO | T8/3 | E/2 | Solder | Brake | Black/Red | Connect to black/red wire on connect E pin 2 from the electronic module under steeringwheel | ||
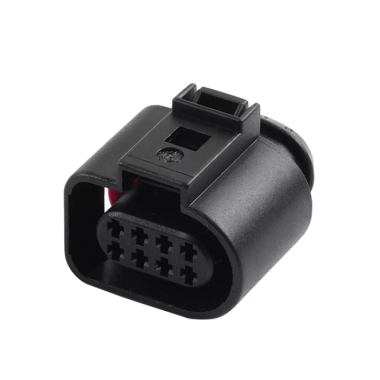
T2 | Fuel sender connector 2 Pin | |||||||
T3 | Fuel sender connector 3 Pin | |||||||
T8 | Haldex Connector 8 Pin | |||||||
T32 | Cluster connector Blue 2008+ | |||||||
T36 | Cluster connector Black before 2008 | |||||||
E | Connector E on Central module above footwell driver side |
Golf MK6 Switched power Fuse box driver side.
SC Fuse 2 15A Black/Violet.
Golf MK6 Ground Connection rear left side above wheel arc.
Golf MK6 CANBUS Connection Gateway footwell right side on center console.
Connector T20 Pin 6 CAN-L Orange/Brown, Pin 16 CAN-H Orange/Black.
Golf MK6 Brake Connection on central unit under dash at steeringwheel side.
Connector C Pin 17 Black/Red wire.
Audi TT Quattro (8N) | 1998-2006 | Gen1 | |||||
Audi A3 Quattro (8L) | 1998-2003 | Gen1 | |||||
Audi S3 (8L) | 1998-2003 | Gen1 | |||||
VW Bora 2.8 V6 4motion | 1998-2004 | Gen1 | |||||
VW Golf Mk4 | 1998-2004 | Gen1 | |||||
VW Golf Mk4 R32 | 1998-2004 | Gen1 | |||||
Skoda Octavia Mk1 4x4 | 1998-2004 | Gen1 | |||||
Seat Leon 4 | 1998- 2005 | Gen1 | |||||
Seat Alhambra | 1998-2008 | Gen1 | |||||
VW Sharan | 1998-2008 | Gen1 | |||||
VW New Beetle | Gen1 | ||||||
Audi A3 8P Quattro | 2004-2008 | Gen2 | |||||
Audi S3 8P Quattro (Pre-Facelift) | 2004-2008 | Gen2 | |||||
Audi TT Mk2 3.2 Quattro | 2007-2010 | Gen2 | |||||
Audi TT Mk2 2.0TDI Quattro | 2007-2010 | Gen2 | |||||
VW Golf Mk5 R32 4motion | 2007-2009 | Gen2 | |||||
VW Golf Mk5 2.0TDI 4motion | 2004-2009 | Gen2 | |||||
Skoda Octavia Mk2 4x4 | 2004-2008 | Gen2 | |||||
SEAT ALTEA 2007-2010 | Gen2 | 0AV | |||||
VW RABBIT 2007-2009 | Gen2 | 0AV | |||||
Audi Q3 Quattro | Gen4 | 0AY | |||||
VW Tiguan 4motion | Gen4 | 0AY | |||||
Skoda Yeti 4x4 | Gen4 | 0AY | |||||
VW Passat and CC 4-Motion | 2009 | Gen4 | |||||
VW Sharan | Gen4 | 0AY | |||||
Seat Alhambra | Gen4 | 0AY | |||||
Audi TT | 2009 | Gen4 | 0BR | ||||
Audi TTS (8J) | 2009 | Gen4 | 0BR | ||||
Audi A3 Quattro (8P) Facelift Models | 2009 | Gen4 | 0BR | ||||
Audi S3 (8P) Facelift Models | 2009 | Gen4 | 0BR | ||||
VW Golf Mk6 'R' | 2009 | Gen4 | 0BR | ||||
Skoda Yeti | Gen4 | 0BR | |||||
Skoda Superb | 2009 | Gen4 | 0BR | ||||
Audi TT RS 8J | Gen4 | 0BY | |||||
Audi RS3 8P | Gen4 | 0BY | |||||
Seat Altea 4 | 2009 | Gen4 | |||||
Audi A1 / S1 8X | 2015+ | Gen5 | 0AY | ||||
Audi RSQ3 8U | Gen5 | 0AY | |||||
Seat Alhambra 7N | Gen5 | 0AY | |||||
Skoda Yeti 5L | Gen5 | 0AY | |||||
VW Tiguan 5N | Gen5 | 0AY | |||||
VW Caddy | Gen5 | 0AY | |||||
VW Sharan 7N | Gen5 | 0AY | |||||
VW Golf 7R | 2013+ | Gen5 | 0CQ | ||||
VW Passat | 2015+ | Gen5 | 0CQ | ||||
Audi TT TTS TTRS | 2014+ | Gen5 | 0CQ | ||||
Audi A3 S3 RS3 | 2013+ | Gen5 | 0CQ | ||||
Seat Octavia | 2013+ | Gen5 | 0CQ |
Not all cars are listed.
If you car is not listed feel free to ask if its compatible.
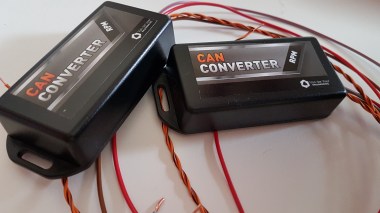
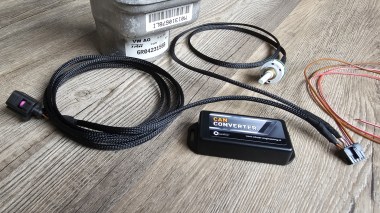
CAN Convertor to analog RPM signal For ECU's without RPM output this will convert the CAN bus signal to a 12v RPM signal.
Also for ECU's that have a 5v RPM output that cannot be used on a 12v Tacho.
All VAG CAN cars
Gen I
Ab 1998
Hydraulische Ringkolben Differential Pumpe (Drehzahldifferenz HA / VA)
Lamellen Ölkupplung
Elektrisch kontrolliertes Druckventil
Regelelektronik.
Vorladepumpe, elektrisch, um etwas Vordruck aufzubauen.
´Der Filterdeckel ist kuppelförmig, aus Nylon und mit einem Spezialschlüssel Gr. 48 / 12 Zahn zu entfernen.
Gen II
Ab 2002.
Hydraulische Ringkolben Differential Pumpe (Drehzahldifferenz HA / VA)
Lamellen Ölkupplung
*Regelkreis mit Drucksensor und elektrisch kontrolliertem Druckventil.
Regelelektronik.
Von außen gesehen:
Bei Gen I war das Differential noch völlig separat und einfach an die Haldexkupplung angeflanscht.
Der Filterdeckel ist flach, rund, aus Metall und mit einer normalen Nuss (Gr. 23/24 ?) zu entfernen.
Der Filter selbst unterscheidet sich etwas von Gen I.
Gen III
Ab 2004.
In VAG Fahrzeugen wurde keine Gen III im eigentlichen Sinn verbaut.
Das war den Volvo und Opel Fahrzeugen vorbehalten.
Für VAG Fahrzeuge erfolgten aber Änderungen in der Software der ECU und Bauteile der Gen II wurden minimal geändert.
Daher wird hier oft auch mal von Gen III gesprochen. (Ist es aber nicht)
Gehäuse, Lamellenpack, Filter, Filterdeckel und Öl ist ist also identisch mit Gen II.
Erstmals wurde hier auch ein optionales quer sperrendes Differential eingesetzt, das von der Haldex ECU angesteuert wird.
(Sportdifferential)
Gen IV
Ab 2008 (Modeljahr 2009!)
*Die Druckregelung wurde geändert. Dazu wurde das Regelventil geändert und es fielen interne Ventile weg.
*Keine Ringkolbenpumpen mehr. Die elektrische Pumpe sorgt für den gesamten Systemdruck.
*Das System wurde noch schneller und wird über den CAN Bus in die Fahrdynamik einbezogen.
Von außen gesehen:
Bei der Gen IV sieht das ganze aus wie ein großer Block.
Filterdeckel und Filter siehe oben im Bild.
Der neue Filter ist wesentlich größer.
(optionales Sportdiff. möglich)
Gen V
Ab 2012 (MQB Plattform)
Die Druckregelung wurde völlig geändert und hat nun einen Zentrifugal Druckregler.
Dabei wurde die Anfälligkeit mit dem Einsatz von weniger Teilen reduziert.
*Wegfall von Akkumulator und Regelventil.
*Druckgenerierung nur durch die Hydraulikpumpe.
Audi:
A3
S3
RS3
TT Coupé
TT Roadster
Bugatti:
Veyron
Buick:
LaCrosse
Regal GS
Cadillac:
SRX
Ford:
Five Hundred
Freestyle
Kuga
Land Rover:
Freelander
Mercury:
Montego
Opel:
Insignia
Insignia OPC
Saab:
9-3 Aero
9-3 Sport Combi
9-3 Turbo
9-3 X
9-5
Seat:
Alhambra
Altea Freetrack
Leon
Skoda:
Octavia Scout
Octavia
Octavia RS
Superb
Yeti
Volvo:
S40 | ||
S60 | ||
S60R | 2005 - 2005 | Gen2 |
S60R | 2006 - 2007 | Gen3 |
S80 | ||
S80L | ||
V40 | ||
V50 | ||
V70 | ||
V70R | ||
XC60 | Gen4 | |
XC70 | 2003 -2005 | Gen2 |
XC70 | 2006+ | Gen3 |
XC90 | <2005 | Gen2 |
XC90 | 2006+ | Gen3 |
Volkswagen:
Beetle RSI | Gen1 | |
Bora | ||
Caddy | ||
Golf R | Gen4 | |
Golf R32 | 2005 - | Gen2 |
Golf Variant | ||
Golf | Gen1 | |
Multivan | ||
Passat CC | 2009 - | Gen4 |
Passat | ||
Sharan | ||
Tiguan | ||
Transporter | ||
The Haldex power is set by a fixed value that the user sets with the App
Can be adjusted in steps of 10%
100 / 0
90 / 10
80 / 20
70 / 30
60 / 40
50 / 50
100 / 0 is 0% to the haldex unit but the pre charge pump is still active for Gen1 and Gen2
The Haldex power is set by the configured value at a certain throttle position.
Throttle position in steps of 10%
0 – 10% 50 / 50
10 – 20% 60 / 40
20 – 30% 50 / 40
The Haldex power is set by the configured value at a certain velocity.
Speed in steps of 20 km/h
0 – 20 km/h 50 / 50
20 – 40 km/h 60 / 40
40 – 60 km/h 50 / 40
The Haldex power is set by the configured value at a certain boost pressure.
Boost in steps of 100 mBar
0 – 100 mBar 50 / 50
20 – 40 mBar 60 / 40
40 – 60 mBar 50 / 40
All signals from the car are passed thru to the Haldex so it will function like original.
The display will shows the current Haldex power.
The Haldex unit is completely off including the pre charge pump.
The car will drive like any normal 2WD car.
Haldex status -- / --
This will show the actual status of the haldex clutch, front wheels / rear wheels.
Since the front wheel are always connected max power to the rear wheel can be 50% 50/50.
Settings button to the corresponding Mode settings.
Brake ignore settings (only visible when activated in settings menu).
Error Icon
When active you can tap the icon to show the error.
No connection to Haldex - problem with communication to haldex
Brake Icon
The icon will light up when the brake is applied.
Parkingbrake Icon
Afb
On the settings tab all the settings of the controller can be changed.
All settings are saved on the controller
Throttle input
Turn ON to use the CAN-BUS throttle signal from the ECU.
Turn Off to use the 5v Analog input on the controller.
Speed input
Turn ON to use the CAN-BUS speed signal from the ABS module.
Turn Off to use the 12v VSS Analog input on the controller.
Brake input
Turn ON to use the CAN-BUS brake signal from the ABS module.
Turn Off to use the 12v Analog input on the controller.
Preffered to set it to analog input its faster and all cars have it connected.
Boost input
Turn ON to use the CAN-BUS boost signal from the ECU.
Turn Off to use the 5v Analog input on the controller.
Parkingbrake input
Turn ON to use the CAN-BUS boost signal from the Tacho.
Turn Off to use the Analog input on the controller.
Speed km/h / mph
Currently not in use, will change all values viewed on the App to mph
Default mode
The controller will start in the selected mode, in last used mode the controller starts in de mode that was used the last time.
Manual switch
When the Haldex Controller is delivered with a manual switch this option must be activated to use the switch.
Only activate when a switch is connected or it could leed to unwanted behavior.
Return mode
When the manual switch is set to App mode it will go to the selected mode.
Brake Ignore
By default the Haldex is turned off when brake pedal is applied.
Turn this option on the Controller will ignore the brake signal and keep the Haldex on the selected value.
Button on main screen
As requested for use on track to easly switch the brake ignore option from the main screen.
Turn on will add a button on the main screen to toggle brake ignore option.
Brake image
By default the brake icon is gray and light gray.
Turn on will set the brake active icon on the main screen to red.
Main screen
Normal is the default layout
Race layout has been added to be used in landscape mode and will have big buttons.
Broadcast Haldex
Special option only used in special occasions, only needed in inline configurations with cars that do not accept the haldex on the CAN network.
Turn off will block haldex traffic to the car this will fix ABS coding problem where coding of 4motion is not possible.
This option allow calibration for the analog boost sensor input.
Check datasheet from used pressure sensor for correct values.
VAG Boost sensor will have 555 mBar per 1 volt
Throttle calibration for the analog input, here you can set the low and high point off the throttle pedal.
Controller Reset
When the button is pressed all current settings will be restored to the default setting.
Controller Reboot
When the button is pressed the Controller will reboot.
Settings for Throttle mode
Settings for Speed mode
Settings for Boost mode
To connect to a different controller, press scan for devices and select the new Haldex Controller from the list.
It will ask for the pincode press 1234 and OK, the new controller is now connected and saved.
This option allow the App to Update the Haldex Controller with new firmware.
Controller firmware will show the current version that is installed.
New firmware is the version that is available to load in the controller.
The Controller needs to be set to the Update mode press the Bootloader button.
When it replies with Bootloader not available the controller needs to be updated with correct firmware by USB cable!
Press Start Update to load new firmware to the Controller, this may take 5-10 minutes to complete the blue bar below will show the progress.
When the update is complete it will message Ready.
When a update fails the controller can be updated or reloaded with a USB cable.
All positions of the manual switch can be programmed.
Press get settings to retrieve all the current settings from the controller.
For each position you can set the desired behaviour.
The switch can be calibrated when position are not cerrectly.
Switch position will show current position if this in not correct perfrom the calibration.
For each position you need to calibrate
Move the switch to the 1 position most left then hit the button set next to Pos 1.
Do this for each position.
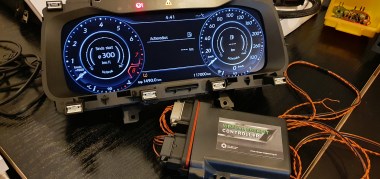
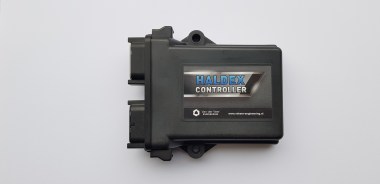
The Haldex Controller can be used for all 4 Motion vehicles, original or Standalone.
All connections are Plug and Play except for the standalone functions.
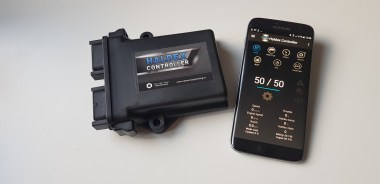
The controller works completely standalone so it does not need the App to function.
When the controller is powered up it starts running the program that was last used.
All settings made in the App are saved to the internal memory of the controller.
The App is used to display the status and change mode and settings.
The Controller can use the input signals from the CAN-BUS or Analog signals
Brake CAN-BUS and Analog 12 volt signal
Speed CAN-BUS and Analog VSS signal
Throttle CAN-BUS and Analog 5 volt signal
Boost CAN-BUS and Analog 5 volt signal
Handbrake Analog Ground signal
RPM from CAN-BUS only
The Controller has a RPM output for converting CAN-BUS RPM to Analog.
Currently available for VAG:
Gen 1 1998 and up
Gen 2 2001 and up 02D 0AV
Gen 4 2007 and up 0BR 0BS 0BY
Working on supporting other is in progress.
VAG and Volvo
Gen 3 2006
Gen 5 2012
Controller Modes: Locked mode Throttle mode Speed mode Boost mode Passthru mode Brake Signal Handbrake Signal
|
|
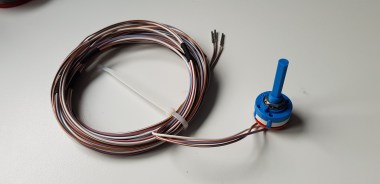
Manual switch
its possible to install a rotary switch and program each position to a specific mode.
Wiring:
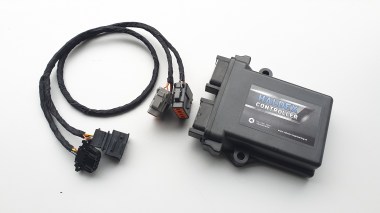
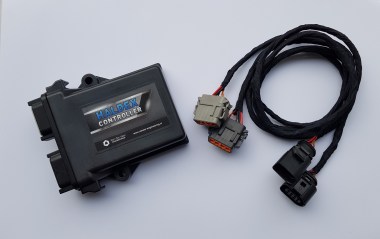
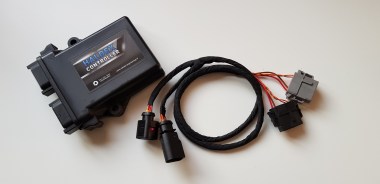
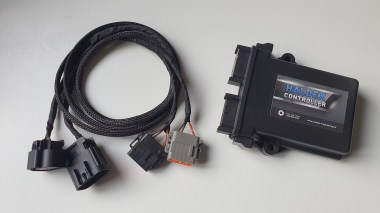
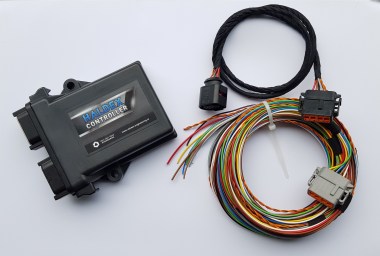
The wiring is supplied with the controller.
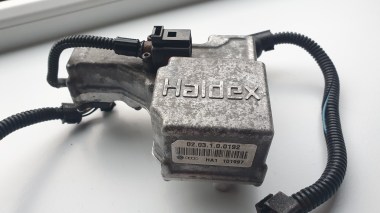
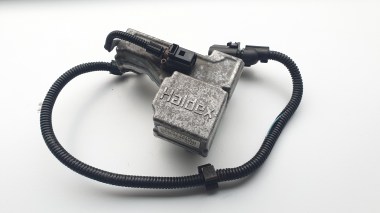
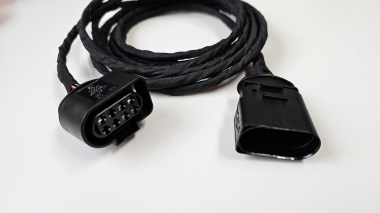
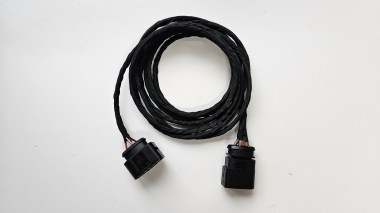
One loom goes from the controller to the Haldex unit
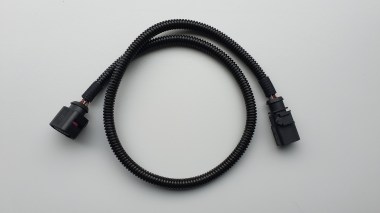
One loom depends on the car. This one goes from the Controller to the car.
For original 4Motion cars connect to the connector.
For standalone run the wires to the front of the car and connect them according to the schematics
Haldex connector:
Power 12v
Ground
Brake signal
Handbrake signal
CAN-BUS signals
K-Line
Car Connector Standalone and original:
Power 12v
Ground
Brake signal
CAN-BUS signals
K-Line
Extra for Standalone:
Handbrake
Speed VSS
Throttle position 5v
Boost pressure 5v
Output 1 (can be used for RPM output for tacho)
Output 2 (Not used)
Haldex Oil temperature
The oil temperature display only works on the latest Gen 1 models and on all Gen 2 and above
All the original oil temperature functions of the Haldex unit are always working if the oil gets to hot the Haldex unit will shut down 4x4.
Haldex Controller software.
The software will be updated with improvements, bug fixes and new features.
Any input and suggestions are welcome, please use our website to submit.
On the settings tab in the App you can see the Firmware version of the Haldex Controller.
The firmware in the controller can be updated thru the USB port.
Updates are available on our website.
The App will be updated thru the Google Play store